What Are The Methods Of Tiles Installation?
02/01/2024
So, you've chosen to work on putting in tiles by yourself so that you can save some money. Congratulations - if you are patient and use the right tools, this is possible for you! Putting in tile is a task that might seem hard, but it's actually easy to do yourself. The important thing is to begin with a good plan, get sorted out and don't rush.
In this complete manual, we'll walk you through the entire process step-by-step: how to get it ready, put out your design, cut tiles so they fit right, stick the glue on them and use grout in between. Then Close with a water-proof seal after that is done.
We'll give advice to handle hard places like corners, edges and changes between rooms. With some hard work, you can make a professional tile job in your home without the high cost of hiring a pro. So put on your work clothes, play some music and let's start tiling! We promise, this will be enjoyable and worthwhile.
Master Tile Installation Methods
Choosing the Right Tile for Your Project
The type of tile you choose depends entirely on where you plan to install it. For floors, ceramic, porcelain, or natural stone tiles are best. They're durable and stain-resistant. For walls, ceramic, porcelain, glass, or natural stone tiles also work well and come in a variety of styles.
For DIY installation, stick with larger tiles, at least 6 by 6 inches. They're easier to handle and require fewer grout lines. Porcelain or ceramic tiles in a matte or satin finish are more forgiving of minor imperfections. Glazed tiles with lots of texture also hide flaws well.
Consider the style you want, from sleek and modern to rustic and natural. Porcelain tiles can achieve a wood or stone look. Ceramic tiles range from solid colors to intricate patterns. Natural stone offers a classic look but requires sealing.
Think about the amount of moisture and foot traffic the area will get. More durable tiles with a slip-resistant surface are best for bathrooms or entryways. Check the tile’s PEI rating - a higher number means better durability.
Plan your layout and purchase 10-15% extra to account for waste. Buy tile, grout, sealant, and any specialty tools at the same time. If you do your homework upfront, your DIY tile installation will go smoothly and the results will look professional.
Preparing the Surface for Tile Installation
To get your surface ready for tile, you'll need to ensure it's clean, smooth, and sturdy.
Clean the Area
The first step is to sweep away all dirt and debris. Mop the floor using a degreaser or tile cleaner in order to eliminate grime and oils. Wipe down the walls with a damp cloth to remove any accumulated dust. Do not proceed until all surfaces have dried completely.
Fill in Uneven Spots
Check for any cracks, holes, or bumps in the surface and fill them in with floor leveler compound or tile mortar. Let the filler dry as directed. Lightly sand any bumps to smooth them out.

Apply a Primer (for some surfaces)
For areas like plywood subfloors or drywall, apply a coat of primer designed for tile installation. Let it dry, then you're ready for the next step.
Add Concrete Backer Board (for some surfaces)
If tiling over plywood, drywall, or plaster walls in a shower or tub surround, install concrete backer board first. Follow the product directions to cut the boards to fit, seal the edges, and securely screw them in place.
With a clean, smooth, flat surface prepared, you've got the perfect base for installing your new tile. Take your time preparing the area and you'll achieve professional-looking results. The extra effort will be well worth it!
9 Different Ways to Lay Tiles for a Unique Interior Design
Whether you’re a seasoned interior design enthusiast or a total tile novice, one thing every creative should know is that there are various ways to make the same tile have different effects. The common denominator in this interior design approach is the tile. The only thing that changes to give a different look is the way that you lay it. Really, it is that simple!
If you take a few pieces of tile from the same batch and start changing the way they’re laid, how many different and visually appealing ways can you come up with? We came up with 9. No doubt, there are probably more ways, but these were the favorites.
Let me tell you a bit about each one.
1. Diagonal
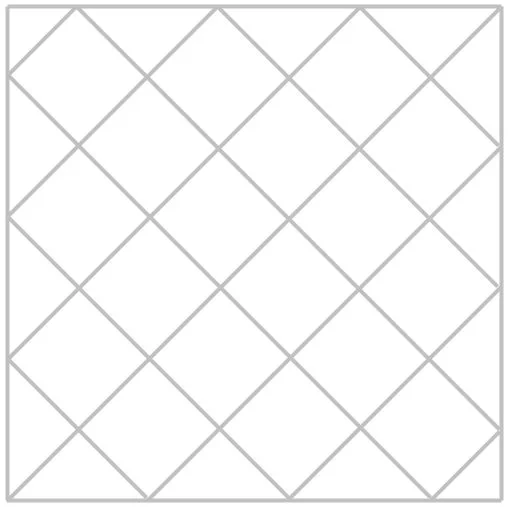
First, lay the tiles in a stack bond design (which I’ll explain later) and then to create the diagonal effect, you’ll want to rotate each tile 45 degrees. The diagonal tile lay is often used to make small rooms appear bigger. An ideal space for the diagonal lay is a small bathroom.
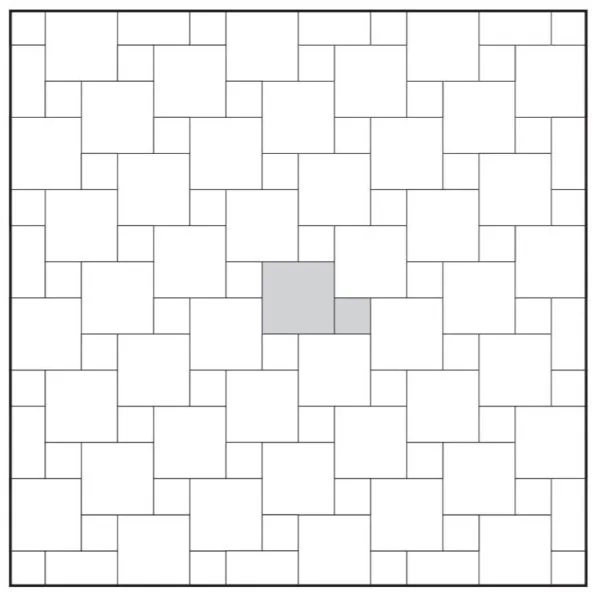
2. Windmill
The windmill lay can make gorgeous tile designs pop even more! At first, this approach can be pretty intense and complicated. But, once the pattern foundation gets laid, the process speeds up. The way it works is by using four brick/rectangle tiles that wrap around a smaller, square tile. This is definitely a bold option, so minimalistic design fans might not be interested. To add even more pop to this design, use a striking grout color to accent the tiles!
3. Herringbone
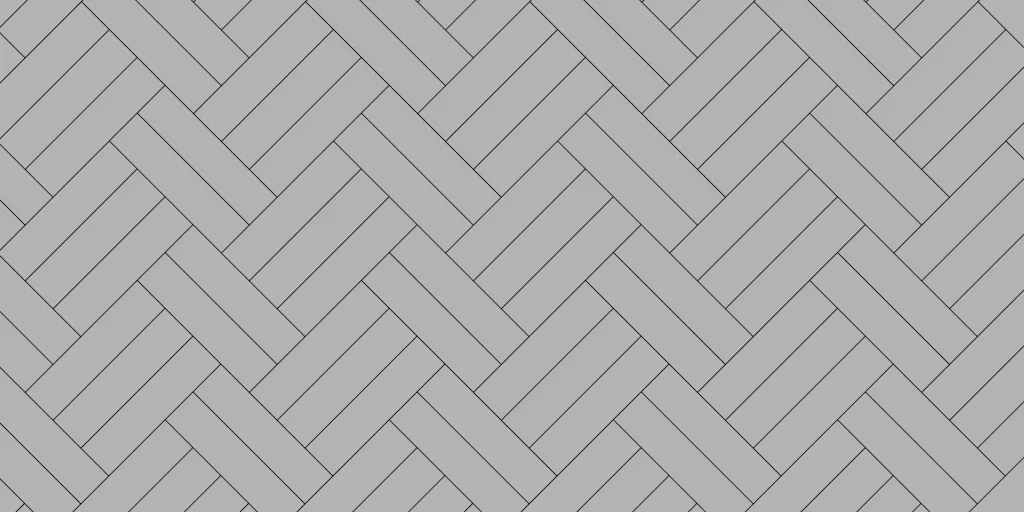
When rectangle tiles are laid in a 45 degree angle, and in a v-shape, it’s called the herringbone lay. Similar to the diagonal approach, herringbone helps create space within a room. This style got its start in Europe and has been used for centuries. It is an elegant and classic addition when used. The bad news is that it’s far too complicated for DIYers or novice tile lovers. Talk to a pro about installation support if you want to go for a herringbone lay!
4. Cobblestone
For a cobblestone lay, you’ll start using the herringbone technique with rectangle tiles. The difference is that each layer line will alternate from rectangle tile to square tile. Square tiles make the overall design appear to be larger than it actually is, which again, can help visually add space to a room.
5. Stack bond

This kind of tile laying is the most straightforward, which is why it’s also known as a straight lay. The description of how to do it is in the name: take the tiles, and stack them in a straight line, side by side. It is important to note that this is by far the easiest tile lay to achieve and is also the most common. It is a great option for beginners or DIYers.
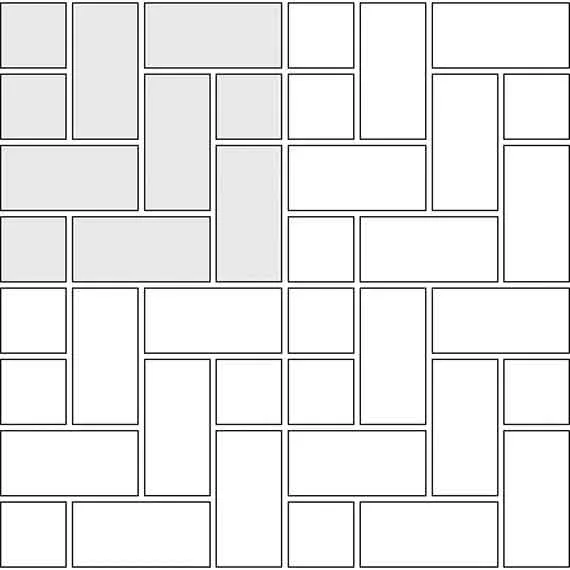
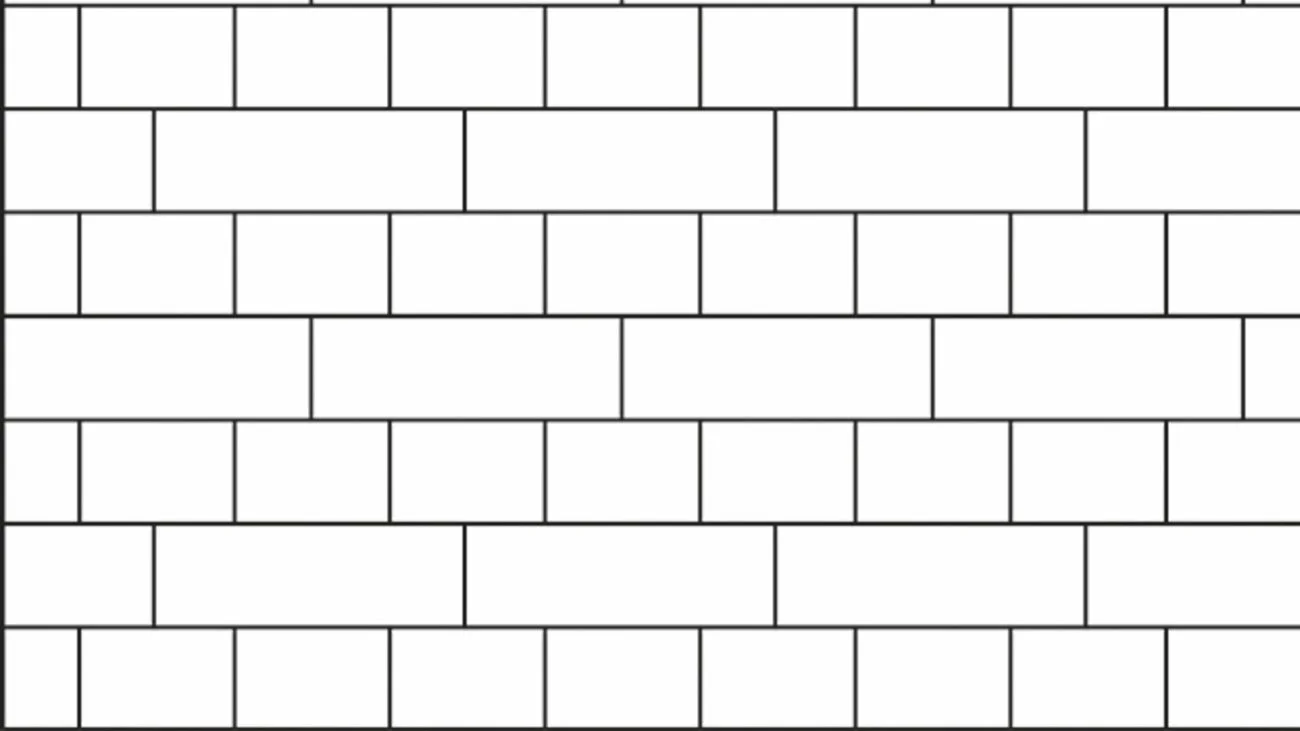
6. Stretcher
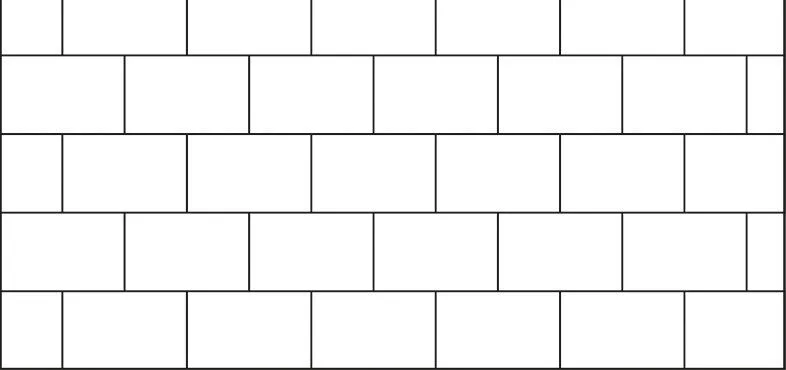
This approach creates a “uniform but not” look. At first glance, the design looks staggered, but upon analysis, you’ll see that it is anything but out of order. To achieve the stretcher lay, use square or rectangle tiles. When laid out properly, they should form what looks like a brick wall. Then, make sure that each tile end is lined up with the centers of the tiles that are below and above it.
7. Hop-scotch
If you like the windmill lay, you’ll love the hop scotch approach! The difference is that instead of using rectangle tiles to wrap around smaller square tiles, all of the tiles will be square. Also known as a pinwheel lay, hop-scotch gives the visual effect of a spinning wheel. To make this tile pattern even more exciting, alternate the colors of the tiles!
8. English bond
This one is another straightforward approach. Each row of tile will alternate from rectangle to square tiles. The english cross lay ensures that there is one square tile centered above each rectangle tile. From there, you just fill in the blanks with square tiles!
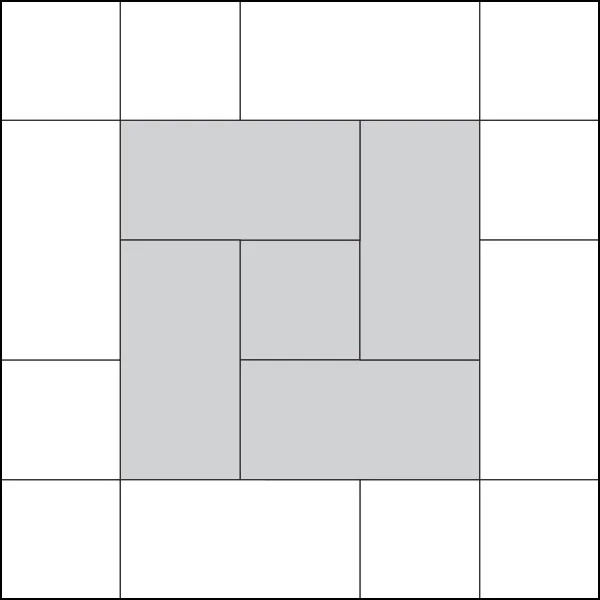
9. Basket weave
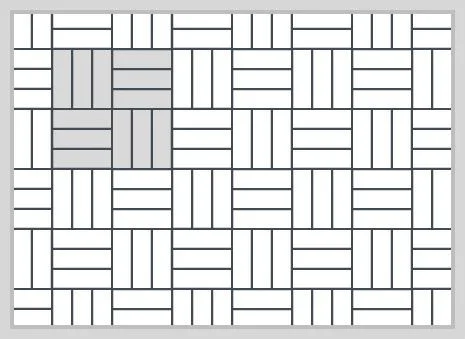
This lay utilizes rectangle tiles. The first set of [4] tiles are laid out next to each other in a square shape. From there, each set of four tiles is laid at a 90 degree angle from the first set. Upon completion, the basket weave lay gives the appearance of a woven tile floor!
Conclusion
So there you have it, a full guide to installing tiles yourself and transforming your space. While it may seem intimidating, if you take it step by step and don’t rush the process, you’ll have a custom tile job to be proud of. Start by planning your layout, gathering the necessary tools and materials, and preparing the surface. Once you begin setting the tiles, work slowly and carefully, using spacers to ensure even gaps. Grout and seal when done to finish it off.
With some patience and the right techniques, you’ll be enjoying your new tiled floor, wall, or countertop in no time. And every time you see the beautiful results, you’ll feel a sense of accomplishment knowing you did it yourself. So take a deep breath and dive in—you’ve got this! With the help of this guide, your tiling project will be a masterpiece.